This tutorial provides a quick walk-through of a python application that loads a QML file. QML is a declarative language that lets you design UIs faster than a traditional language, such as C++. The QtQml and QtQuick modules provides the necessary infrastructure for QML-based UIs.
In this tutorial, you’ll also learn how to provide data from Python as a QML context property, which is then consumed by the ListView defined in the QML file.
开始前,安装以下先决条件:
PySide2 Python 包。
Qt Creator v4.9 beta1 或更高版本来自 http://download.qt.io .
以下逐步说明指导您使用 Qt Creator 完成应用程序的开发过程:
打开 Qt Creator 和选择 File > New File or Project.. 菜单项以打开以下对话框:
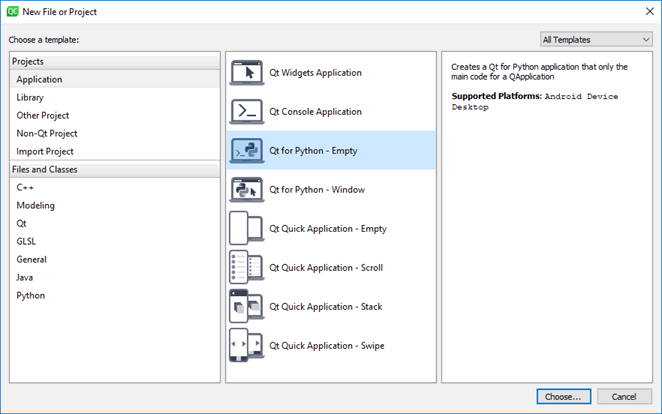
选择 Qt for Python - Empty from the list of application templates and select Choose .
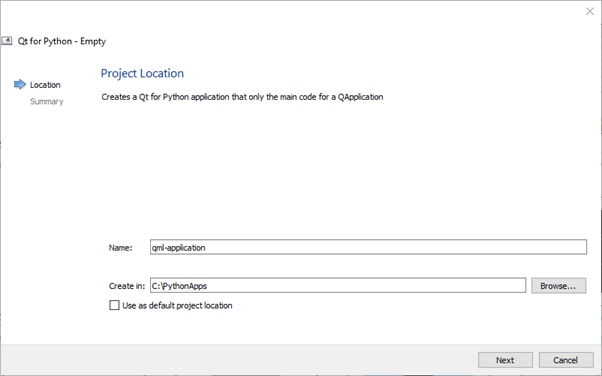
Give a
Name
to your project, choose its location in the filesystem, and select
Finish
to create an empty
main.py
and
main.pyproject
.
This should create a
main.py
and
`main.pyproject
文件为工程。
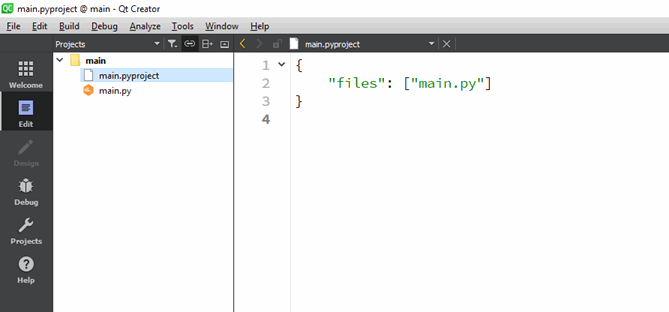
双击
main.pyproject
to open it in edit mode, and append
view.qml
and
logo.png
到
文件
list. This is how your project file should look after this change:
{
    "files": ["main.py", "view.qml", "logo.png"]
}
Now that you have the necessary bits for the application, import the Python modules in your
main.py
, and download country data and format it:
现在,设置应用程序窗口使用 PySide2.QtGui.QGuiApplication ,管理应用程序范围的设置。
注意
Setting the resize policy is important if you want the root item to resize itself to fit the window or vice-a-versa. Otherwise, the root item will retain its original size on resizing the window.
You can now expose the
data_list
variable as a QML context property, which will be consumed by the QML ListView item in
view.qml
.
加载
view.qml
到
QQuickView
和调用
show()
以显示应用程序窗口。
最后,执行应用程序以启动事件循环并进行清理。
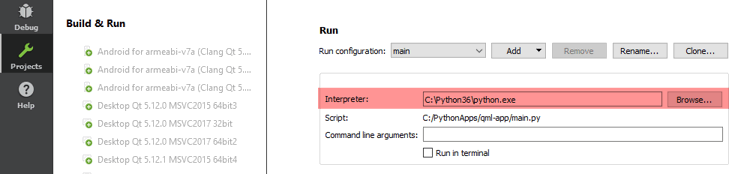
应用程序就绪,现在可以运行。选择 Projects 模式以选取运行它的 Python 版本。
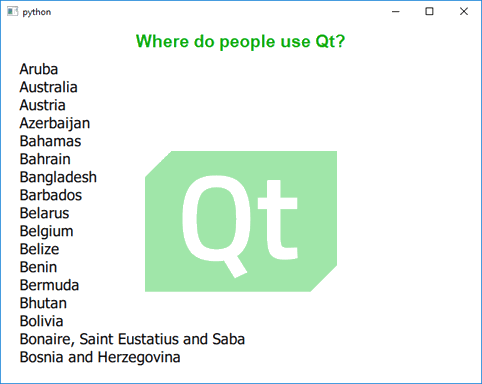
运行应用程序通过使用
CTRL+R
键盘快捷键,看是否看起来像这样:
You could also watch the following video tutorial for guidance to develop this application: